


Read Time : 4 Minutes
Solar thermal system installation walkthrough.

How are solar thermal panels installed?
Before deciding to go ahead with a solar thermal installation, it is a good idea to speak to a range of installers who will give you a quote for the system. It is also necessary to have an MCS-accredited surveyor (and not a salesman) inspect your property, who will do the following:
- measure your roof’s orientation, inclination and shade coverage
- give you an estimate of the solar thermal system output based on your property's geographical factors
- ascertain your current hot water consumption/needs (based in part on your property’s EPC rating, if you have one)
As noted in other sections, only those systems installed by MCS-accredited installers are eligible for the DECC Renewable Heat Premium Payment and Renewable Heat Incentive payments. A typical solar thermal installation will involve the following steps: A solar thermal system is predominantly a plumbing exercise with a small amount of electrical wiring, roof installation and system assembly. The below run-through can vary form system to system, depending upon the exact components your solar thermal system comprises of, for example, a vented or unvented cylinder, evacuated tube collector or flat plate collector etc.
COMPARE PRICES FROM LOCAL INSTALLERS
Compare prices from local companies fast & free
Enter your postcode to compare quotes from leading professionals. We promise to keep your information Safe & Secure. Privacy Policy
The solar thermal collector installation
scaffolding may be required at this stage
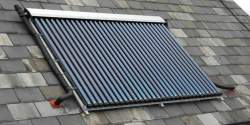
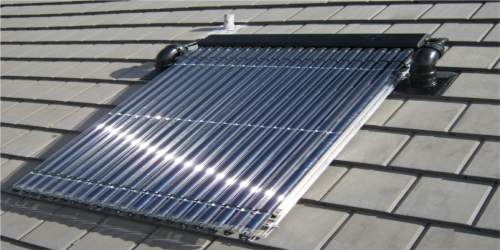
- Fit collectors frames on roof, attaching them using stainless steel brackets to which the collector frames are attached. There are a variety of different mounting methods all specially designed not to compromise the integrity of the roof and ensure it remains water tight. These brackets are fixed directly to the building’s rafters. Roof tiles/slates will need to be removed in order to screw the hooks for the frame into roof rafters. The tiles/slates will be replaced once this is complete, and waterproof flashing will be applied to the roof in order to avoid any leakages. If you have a flat roof, the frame will be set at the appropriate angle.
- For the evacuated tube system, the heat transfer unit will be bolted to the top of this frame, however the evacuated tubes will not be connected / installed until the last moment. This is because once the evacuated tubes are installed, they will immediately start to provide heat (even in low light conditions) to the exchanger which can damage the unit if the system has not got transfer fluid in and is not up to pressure.
 |
 |
| Mounting brackets | Solar Thermal Collectors |
Heat storage / hot water cylinder installation
- If you do not need to replace the boiler this will involve installing the new dual coil water cylinder, as well as the pump and system control panel. This can be done in the loft or an upper floor of the property. Some installations may require additional plumbing work at this stage.
- The installation of a new thermal store / hot water tank will be needed to store the heat provided by the solar thermal collector. This tank is much larger than a standard immersion heater tank but it is possible to fit it in place of the old one (if present). This tank will be connected to:
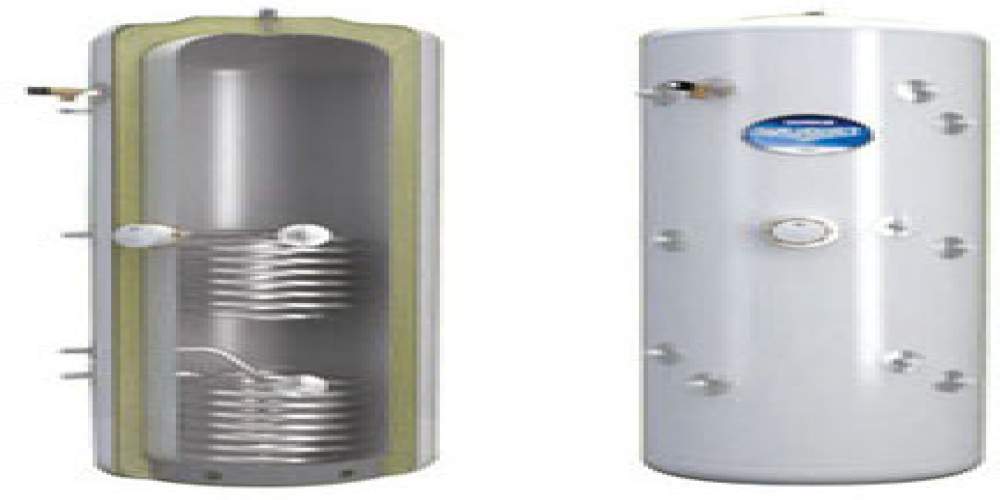
- The mains cold water (or header tank)
- Auxiliary heating (gas boiler, biomass boiler, wood stove etc.)
- Electric immersion heater (element inside the tank)
- The solar collector
- Temperature sensors for managing the whole system.
- An expansion vessel (unvented models only)
Plumbing in the solar thermal system
- The pumping station will need to be installed (normally near the water tank); this is where the system pump for the closed loop solar thermal system is installed and the control equipment.
- The expansion tank will be installed on the solar thermal loop (normally near the water tank and pumping station); this prevents pressure changes in the system damaging components.
- Special insulated pipes will be installed between the pumping station and the solar thermal collector. This is the ‘flow and return piping’ which contains the heat transfer fluid. The pipe insulation is also fitted at this point. The distance between the thermal store tank, pumping station and the collector must be kept to a minimum to ensure a high system efficiency. These are predominantly installed with special tiles or fitments that allow the pipes to pass through the roof so the system has as little aesthetic impact as possible whilst ensuring the roof’s integrity.
 |
 |
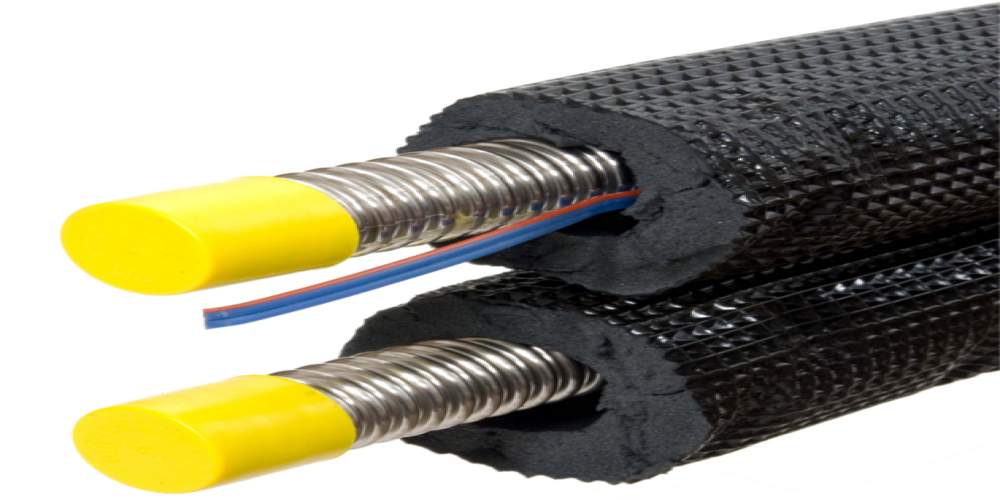 |
| Pumping Station | Expansion Tank | Insulated Pipes |
Electrics and control system
- Fit the heat generation meter - this must be MCS-certified, and will measure the heat generated by your solar system, based on the flow of heat liquid. The meter is required for the purposes of calculating Renewable Heat Incentive payments.
- The electrics will have to be installed by a trained electrician and will provide power to the control equipment and the immersion heater element.
- Control equipment installation can vary dramatically based upon the exact system you purchase but the majority of these systems are automatic, pumping the maximum heat possible from the collectors to the thermal store at the required times.
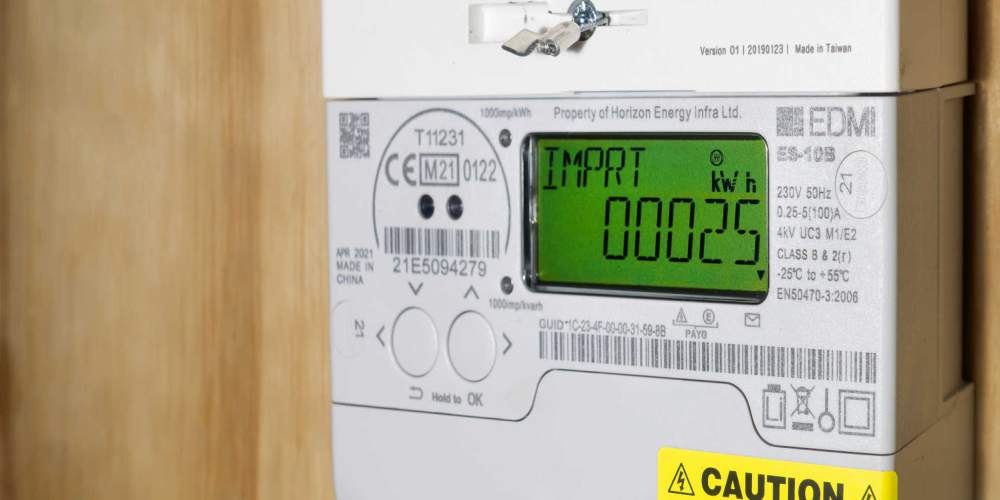 |
|
| Generation / Export Meter | Control Equipment |

Bringing the system to pressure.
- The special heat transfer fluid will be pumped into the closed loop system; this fluid is formulated for solar heating systems operating up to 200°C and contains special reversibly vaporisable inhibitors to protect all metals found in solar heating systems. It also acts as an anti-freeze down to temperatures as low as -25°C and is normally non-toxic and biodegradable. The fluid is then pressurised to approximately 2 bar or as per the manufacturer’s exact specifications.
 Heat transfer fluid / anti-freeze
MCS registration
At the end of the installation process your installer will also register your solar thermal system with the Microgeneration Certification Scheme.
For small systems, the installation will only take 1-2 days. During some of this time you will be without hot water. Larger installations may take longer than this.
Installing solar thermal: considerations
A solar thermal system is a sustainable and cost-effective solution for harnessing the sun's energy to generate heat for various applications, such as heating water or spaces. The installation of a solar thermal system involves several key steps, from initial planning to final implementation. Below is an overview of the process, which typically involves collaboration with professionals experienced in renewable energy systems.
Site Assessment:
The first step is a comprehensive site assessment to evaluate the suitability of the location for the solar thermal system. Factors such as solar exposure, shading, roof orientation, and available space are considered. The assessment also includes an analysis of the current energy consumption patterns to determine the appropriate system size.
System Design:
Once the site assessment is complete, a tailored solar thermal system design is created. The system's components, such as solar collectors, storage tanks, pumps, and control units, are selected to match the specific requirements of the site.
Obtain Permits:
Before installation can commence, necessary permits and approvals from local authorities must be secured. These can vary depending on the region and the scope of the project.
Installation:
With the design approved and permits in place, the installation process begins. The solar collectors are mounted on the roof or a ground-based structure, carefully positioned to maximize solar exposure. The pipework connecting the collectors to the storage tank is installed, and the system is connected to the existing heating infrastructure.
Testing and Commissioning:
After installation, the system undergoes rigorous testing and commissioning to ensure it operates efficiently and safely. This phase includes checking for any leaks, verifying proper circulation of the heat transfer fluid, and calibrating control settings.
Training and Maintenance:
Once the system is operational, the property owners or occupants receive training on its use and maintenance. Regular maintenance is essential to ensure the system's longevity and optimal performance. Maintenance tasks typically include cleaning the solar collectors and inspecting all components for wear and tear.
Monitoring and Optimization:
To maximize the system's efficiency and track its performance, it is beneficial to implement monitoring tools. Monitoring helps identify potential issues early on and provides valuable data for system optimization.
By investing in a solar thermal system, individuals and businesses can reduce their reliance on conventional energy sources and decrease their carbon footprint. The installation process, when done correctly, provides a reliable and sustainable heating solution that can offer long-term benefits for both the environment and the property owner.
Find a local installer
Welcome to the biggest directory of UK renewable energy companies