Read Time : 9 Minutes
How is an Air Source or Ground Source Heat Pump Installed in the UK?
The installation of both air-source and ground-source heat pumps require careful planning, professional installation, and compliance with local regulations. It's important to work with accredited installers to ensure the system's safety, efficiency and reliability.
Before you consider who you are going to get to install your heat pump system, you need to do a full assessment of the current energy performance of your house or office. Although your installer can do this for you it can be cheaper to employ an independent energy assessor who can issue you with an Energy Performance Certificate (EPC). An EPC gives a property an energy efficiency rating from A (most efficient) to G (least efficient) and is valid for 10 years.
Your EPC might recommend that you improve your home’s insulation or fit double or triple-glazed windows to reduce the amount of heat escaping from your home.
An EPC contains:
- Information about a property’s energy use and typical energy costs
- Recommendations about how to reduce energy use and save money
- Floor plans and a property size measurements
Another important consideration when installing a heat pump is the space required for the various components of the heat pump system, some of which will be inside and some outside. The size and location of the heat pump components will depend on the type of heat pump you choose. Heat pumps require an indoor hot water cylinder, and some properties may also need a buffer tank which could make the system not suitable for smaller homes.
Due to the fact that heat pumps run at a lower temperature than tradition boilers, your installer will need to check whether your existing radiators are big enough to heat your home to a level that is comfortable for you. Heat pumps work at a lower temperature than a combustion boiler which means that your radiators will feel cooler to touch but this is quite normal.
It's often necessary to replace a couple of the radiators in the main living areas to increase the surface area that heat is radiated from. This is particularly necessary where a property has single radiators and not doubles.
Insulation Checklist
How well your property is insulated plays a big part in the size of the heat pump you select and how efficient it is going to be. Compared to something like a gas boiler, heat pumps produce heat at a lower but more constant temperature which means that insulation becomes all the more important. Heat pumps are designed to create an ambient temperature on an ongoing basis, rather than the on-off blast of heat from a combustion boiler. Insulation measures to consider:
- Cavity/wall insulation.
- Loft insulation.
- Double glazing.
You may want to take a look at how well your floors are insulated if you live in a much older house.
It's also worth noting at this point, that heat pumps are getting better at producing higher temperatures through even the coldest days. Most heat pumps are capable of effectively heating your property (provided they have been sized and installed correctly) in temperatures down to -15°C. There are also high temperature heat pumps available now, these operate at a slightly lower efficiency but are capable of heating water to between 60°C and 80°C.
Although it is no longer compulsory to carry out an EPC’s recommendations for insulation or double glazing to be eligible for the government’s low-carbon heating subsidy, the Boiler Upgrade Scheme (BUS), government guidance still advises that properties should be appropriately insulated. An insulated home is not only more energy efficient, but it helps to reduce your heating costs too.
Air Source or Ground Source Heat Pump?
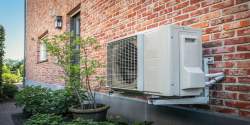
The next thing you need to look at is whether you are going to go for an air source or ground source heat pump. As a rule, air-source heat pumps are easier to install but are slightly less efficient. These heat pumps can easily be installed on the wall or directly on the ground due to their smaller size and simpler installation requirements. The one thing you will need to decide is whether you have the external space to accommodate the main pump unit.
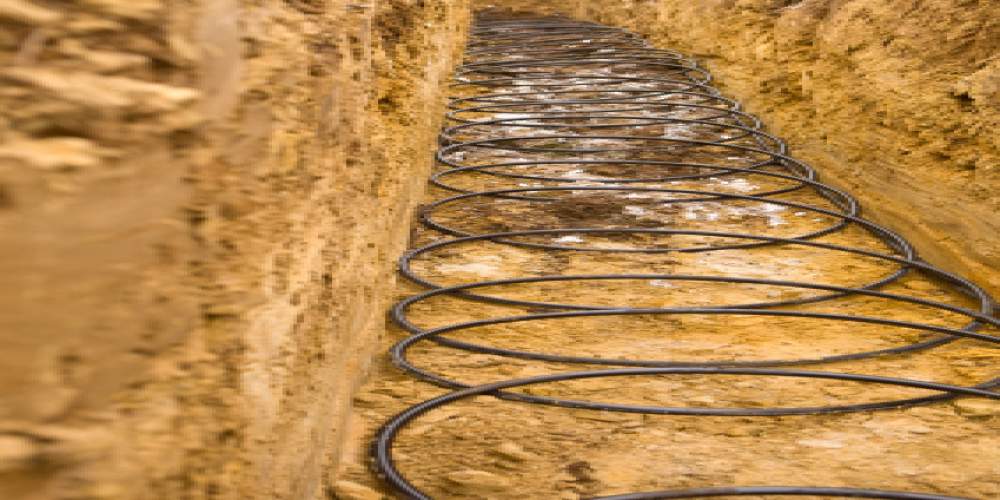
A ground source heat pump is more efficient but needs a site where the external pipes can be buried and involves a good deal of excavation work. The ground needs to be dug up to install ground loops either vertically or horizontally. Whether you opt for a vertical or horizontal system a significant amount of workload and space will be necessary. If the workers cannot access your site with their diggers and heavy machinery, then you may want to look at an air-source heat pump instead.
Both air-source heat pumps and ground-source heat pumps have a typical efficiency rating of 300% which is three times better than the average gas boiler. Some air-source heat pumps can reach efficiencies of over 400% while some ground-source heat pumps have an approximate 450% efficiency all year round. Heat pumps can reach these levels of efficiency due to their ability to transfer heat rather than produce it from fuel.
Ground-source heat pumps provide a much more stable source of heat as they don’t depend on the outside temperature and the underground temperature stays between 10 and 13 centigrade throughout the year. The UK’s air temperature changes through the different seasons and often over a single day.
Air-source heat pumps are cheaper to install than ground-source heat pumps as the installation procedure is simpler and less labour-intensive. Ground source heat pumps are more complex and therefore take longer to install due to the amount of work involved which makes them more expensive. The cost of an air-source heat pump installation ranges from £8,000 to £14.000+ while a ground-source heat pump installation costs between £18,000 and £35,000+. Currently, these costs can be reduced by £7,500 with the Boiler Upgrade scheme for both types of heat pumps.
Air-source heat pumps require more frequent efficiency checks than ground-source heat pumps although the difference in maintenance costs between the two is not significant enough to be of any great concern. Although air-source heat pumps are cheaper to install, ground-source heat pumps last longer and rank better in efficiency.
Both ground-source and air-source heat pumps make some noise but are usually quieter than fossil fuel boilers. The decibel level of an air source heat pump can reach between 40 and 60 decibels but will depend on the manufacturer and installation. The noise level of a ground source heat pump is generally similar to a typical domestic refrigerator at about 42 decibels. Ground-source heat pumps tend to be quieter than air-source heat pumps as they are located underground and don’t have to work as hard to draw heat from the ground.
COMPARE PRICES FROM LOCAL INSTALLERS
Compare prices from local companies fast & free
Enter your postcode to compare quotes from leading professionals. We promise to keep your information Safe & Secure. Privacy Policy
Finding the Right Installer
You can search our database for a list of installers close to your postcode here. We recommend that you get at least three quotes for the work to be done and do your research on the technology beforehand so that you can ask the right questions.
Before installing your heat pump, you will need to consider the Boiler Upgrade Scheme which is a government initiative that helps with the high upfront costs of installing a heat pump. The BUS can offer up to £7,500 and is simple to apply for providing your property meets the energy efficiency requirements.
Though it is in your best interest to follow any EPC recommendations or advice that your installer gives you it is no longer compulsory to carry out efficiency improvements to be eligible for the Boiler Upgrade Scheme. However, to qualify for this grant, you will need to ensure that your installer is a member of the Microgeneration Certification Scheme.
The Renewable Energy Hub has a comprehensive directory of installation companies that we keep an eye on. You can access this directory here. Contact the companies through the contact forms to request quotation. Alternatively, fill in one of the forms on this page and we'll give you a call to discuss your requirements and answer any questions you may have.
Air Source Heat Pump Installation Walk Through
The process of installing an air source heat pump involves several important steps to ensure the efficient and effective operation of the final system.
Step 1: Initial Assessment and Planning
Your heat pump installer will conduct a site survey to find out whether a heat pump is suitable for your home and what specifications the system will need to provide the heating you require. The installer will carry out a heat loss calculation to determine how much heat is needed to keep your home warm. This calculation will provide the groundwork for their recommendations for your heat pump system. It’s important to ensure that the heat pump is appropriately sized. You can also contact an independent energy assessor, who will be able to provide you with an Energy Performance Certificate (EPC).
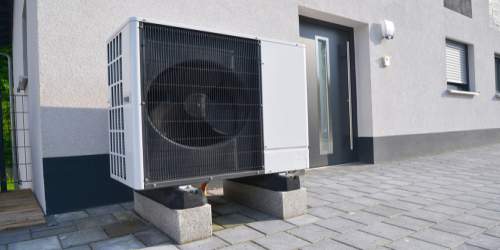
The installer will assess your property to decide the best location for the outdoor unit looking at factors such as noise levels and proximity to neighbours. Air source heat pumps can be either mounted onto a wall or positioned on the ground. The outdoor unit ideally needs to be in a sheltered and safe place where it won’t be subjected to heavy rains and winds or be tampered with by anyone passing by.
You also need a reasonable clearance around the unit (about 200mm for some wall-mounted units, more for bigger, floor systems). The installation will involve an outdoor section and an indoor section, so make sure there is enough space inside as well. Once both units are fitted onto their mountings, refrigerant, and drain hose pipes are connected and then insulated, both inside and out. The whole system can then be connected to your indoor heating system such as the boiler or radiators.
Step 2: Choosing Your Heat Pump
Once your initial assessment has been completed, your installer will inform you of the specifics of the recommended heat pump system, including the size and power of the heat pump and where the initial heat source will be drawn from.
Step 3: Pre-installation Recommendations
Before you go ahead with the installation it is advisable to action any recommendations from the initial assessment to improve the efficiency of your heat pump or to make the installation process easier. This might include, improving your home’s insulation, replacing existing radiators with bigger ones, or obtaining planning permission. Air source heat pump systems don’t usually need planning permission, but permission may be required if your property is listed, or you live in a conservation area. It’s worth checking with your local council that there are no regulations in place.
It's important to ensure that your installer is certified by the Microgeneration Certification Scheme (MCS) and that the installation complies with building regulations. Heat pumps must be at least a metre away from your property’s boundary and only be used for heating purses.
Step 4: Installation of the Outdoor Unit
The actual heat pump will be installed just outside your home, next to one of the external walls. It will either be bolted to a flat solid concrete base or attached to the wall using brackets to avoid vibrations. The heat pump needs to be secure enough to withstand rain, hail, or snow. The installer will choose a spot where there is sufficient clearance around it to ensure proper airflow.
Preparations for connection to the indoor unit are made. Refrigerant pipes, electrical wiring, and condensate drains are connected from the outdoor unit to the indoor components.
Step 5: Installation of the Indoor Unit
The indoor unit is typically made up of a heat exchanger and a fan which are located in a position that allows easy access for maintenance and optimal heat distribution. The inside unit will usually be positioned on an external wall and will be mounted on a bracket. The installer drills a hole through the wall and feeds the necessary cables and pipes to the outside, where they can be connected to the external unit. If the heat pump is to work alongside existing heating systems such as a boiler, appropriate controls and connections need to be established.
You will also need a hot water cylinder for your hot water. Your installer will recommend the right size for your home. To give you a rough idea, the average 3-bedroom house will need a 200-litre hot water cylinder. If you already have a hot water cylinder, it probably won’t be compatible with your heat pump system, as the coil is usually too small to reheat the water as quickly as it should.
Step 6: Electrical and Plumbing Work
Air source heat pump systems have electrical connections that need to be made by suitably qualified electricians. They need to be connected to the home’s electrical systems and often require a dedicated circuit. The system also needs to be connected to your home’s hot water and central heating systems.
Your installer should have a technical certificate in plumbing such as an NVQ2/3 with Water Regs and Unvented qualifications. If your installer is a fully qualified plumber, they may include other sanitary and plumbing installation works within the contract.
Step 7: Commissioning and Testing
Your installer will conduct several checks to make sure everything is working properly, and the system meets the heating and cooling needs of your home while being safe to use. The entire system is checked for leaks and refrigerant levels are verified.
Step 8: Handover to Property Owner
Homeowners are given detailed instructions on how to operate the heat pump system. A maintenance schedule is worked out with the installer to ensure the system remains efficient over time.
Ground Source Heat Pump Installation Walk Through
Step 1: Initial Assessment and Planning
Adequate planning and preparation is perhaps the most important step in the design of a ground source heat pump system. Installing a ground source heat pump is far more complex than an air source one. You will need the space to lay the pipes and you will have to provide access to heavy equipment such as diggers.
A detailed geological survey of the ground conditions is carried out to determine the suitability of the ground for ground loops. Your heat pump installer will look at exactly what type of heat pump, energy supply source, and energy distribution would be the best fit. The installer will work out your domestic hot water requirements, existing exchanger, and heating systems as well as your home’s current level of insulation and the geology and hydrology of the soil in your land. Just as for an air source heat pump, a heat load calculation is vital to ensure the system is properly sized.
If you have a small area, then it may be possible to dig down vertically by drilling a borehole up to 100m deep. This will obviously depend on the nature of the ground under your property and may require an even more detailed and full survey which could add a significant cost to the build. The pipes from the outside array feed into the heat pump within the building which is then connected to the existing heating supply such as radiators as with an air source heat pump.
Step 2: Permits and Regulations
Installation of a ground source heat pump should not need planning permission despite the disruption caused by digging up the ground, as it is considered a permitted development. However, permits are more likely compared to air source heat pumps due to the groundwork involved. You may need permission from local councils or environmental agencies. If you live in a listed building or a conservation area, then the rules will be different. Either way, it is always wise to check with your local council first to make sure your installation is possible. If you have enough garden space, then an array of horizontal ground pipes that collect heat over a wide area is probably the better option.
As with air source heat pumps the ground source heat pump installation must comply with MCS standards and Building regulations.
Step 3: Ground Loop Installation
If your property has ample garden space, horizontal trenches are dug which are usually one to two metres deep, to lay the ground loops. The ground loops (pipes) are then laid in the trenches and connected to the manifold. Later, the installer will fill the pipes with a mixture of water and antifreeze solution that will act as a heat exchanger. The trenches are then backfilled. Although horizontal loop systems are cheaper than vertical loop systems they do require a minimum of half of an acre of land. On average the excavation process takes one to two days.
If space is limited, then an alternative to a horizontal loop system is a vertical loop system. Boreholes are dug vertically using a drilling rig to depths of anywhere between 15m and 122m depending on the required heat exchange. Pipes are then buried in them. These systems tend to be a bit pricier to implement but because ground temperatures are more stable the deeper the loop is located; the heat collection efficiency is also considerably higher.
Step 4: Modify the Heat Distribution Infrastructure
Your installer will modify your ductwork and if necessary, replace your old heat distribution infrastructure with a newer one. Underfloor heating works well with ground-source heat pumps. If your installer is working alone this can take up to three to four days to complete.
Step 5: Installation of the Heat Pump
Your installer will connect the heat pump to the ductwork, the ground loop, and possibly the underfloor heating. The indoor unit, which houses the heat exchanger and controls is installed similarly to the air source heat pump. The ground loops are connected to the heat pump via insulated pipes to minimise heat loss.
Step 6: Electrical and Plumbing work
As with air source heat pumps a dedicated electrical connection is made so a suitably qualified electrician is required. The heat pump is integrated into the existing central heating and hot water systems so adequate plumbing certification is necessary.
Step 7: Commissioning and Testing
The ground loop system is filled with a water and antifreeze mixture and then pressurised. The system is thoroughly checked for leaks and to ensure it's working properly. The heat pump’s performance is tested to ensure it meets the heating and cooling requirements of your property.
Step 8: User Training and Handover
Homeowners are provided with detailed instructions on the operation of the ground source heat pump system. A maintenance schedule is worked out with the installer to ensure the system’s efficiency and longevity.
How to Benefit from the Boiler Upgrade Scheme.
As long as you have had your installation carried out by a company that is part of the Microgeneration Certification Scheme and your property meets the current eligibility requirements, you may be eligible for the Government’s Boiler Upgrade Scheme (BUS).
The BUS has been increased from £5,000 to £7,500. Your installation company must be MCS-certified and/or Trademark. The installation company will apply for the grant for you in most cases. The grant is not available to developers but can be given if a new build is classed as self-build.
Find a local installer
Welcome to the biggest directory of UK renewable energy companies