Read Time : 4 Minutes
Solar Panel Installation
In this section we give a detailed breakdown of all the information related to the installation of a solar PV system.
How are solar panels installed?
Installation walkthrough of a typical solar panel system.
Before contacting PV installation companies it is advisable to secure an Energy Performance Certificate (EPC) for your property. When seeking a quote for a solar panel installation, it is necessary to have an MCS accredited surveyor (and not a salesman) inspect your property. The surveyor will do the following:
- Measure your roof's orientation, inclination and shade coverage
- Give you an estimate of the PV system output based on the above geographical factors
- Give an estimate of the money you are likely to earn/save
- Assess your roof's ability to bear the weight of a PV installation
- Check your property's electrical specifications (fuse box, metering etc.)
- Ascertain your current, and future energy consumption/needs based on bills from your energy provider or information from your smart meter.
- Talk you through District Network Operator permissions (DNO)
- Explain any guarantees and warranties
- Not be too pushy for a sale! Never agree to money off your bill if you sign the contract there and then!
The PV installation itself will involve the following steps:
- Put up scaffolding for roof access - this may not be necessary if your property has only one storey
- Attach roof hooks to rafters - roof tiles/slates will need to be removed in order to screw the hooks for the frame into your roof rafters. The tiles/slates will be replaced once this is complete, and waterproof flashing will be applied to the roof in order to avoid any leakages. In some cases it may also be necessary to cut roof tiles in order to achieve a flush fit
- Fix frame to hooks - the rails that comprise the mounting frame are attached to the roof hooks and screwed together
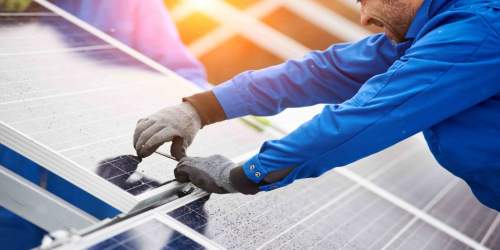
- Mount PV panels onto frame - the panels containing photovoltaic cells are mounted onto the roof frame with the use of clamps
- Connect panels to inverter - the solar panels' DC output is wired to the inverter which then converts the electricity into AC for use by your property's electrical appliances or for export to the grid. The DC cabling can either be placed underneath roof tiles and wired to an inverter within your property, or a small hole can be drilled through roof slates. Once again, waterproof flashing may be used to avoid water damage
- Electrical wiring - the DC output from the roof array is wired to the inverter, and the AC output from the inverter is connected to your property's electricity supply and the electricity grid. Other electrical components such as AC & DC isolators are installed for safety, and an Ofgem-approved generation meter will be placed after the inverter
- Connection to electricity grid - in order to connect the PV system to the grid, your installer will work with your region's electricity company, known as a District Network Operator (DNO)
- Final checks - your installer should perform final electrical safety and performance checks before commissioning the system, and provide you with the necessary documentation (manuals, warranties, maintenance information)
- MCS registration - your installer will also register your PV system with the Microgeneration Certification Scheme.
You can find out who your network operator is here. https://www.energynetworks.org/customers/find-my-network-operator
COMPARE PRICES FROM LOCAL INSTALLERS
Compare prices from local companies fast & free
Enter your postcode to compare quotes from leading professionals. We promise to keep your information Safe & Secure. Privacy Policy
Site location of a Solar PV Systems
As mentioned already, geographical and seasonal factors will inevitably impact upon the efficiency and output of your Solar PV installation. Southern and coastal areas receive the most sunlight, although most areas of the United Kingdom are suitable for the generation of solar energy. Since all panels in PV arrays are connected (unless you have micro-inverters installed), one panel receiving less light than the others will affect whole system's performance.
For best system output, it is therefore necessary that your roof has little or no shade coverage. Even slight shade coverage can greatly reduce system output. You can check the level of sunlight that your area receives using the Met Office's solar irradiation map.
Lovely house, but likely unsuitable for Solar Panels
How roof orientation and tilt affects the output and performance of solar panels
An unobstructed, south-facing roof with an inclination of 30° from the horizontal is optimal, although solar panelscan be installed at any angle, whether they are mounted on walls, or on a flat roof.
The majority of roofs in the UK have a tilt of between 30°-45°, though a roof tilt of between 12° and 45° from the horizontal should provide a good output.

As noted above, roofs facing due south are optimal, though by no means essential for solar electricity generation. The output of south-east- or south-west-facing roofs may be up to 10% lower than those that are south-facing. The output of arrays mounted on east- and west-facing roofs may be up to 20% lower.
If you have an east-west facing house, it is advisable to place one solar collector on each side of the roof, thus maximising the amount of solar radiation received throughout the day.
The Energy Savings Trust has a useful roof orientation and tilt table which shows the approximate system efficiencies on their website:
https://pvfitcalculator.energysavingtrust.org.uk/
The different types of solar panel mounting methods
By far the most common way to install domestic PV panels is to mount them directly onto your property's rafters using specialist roof hooks, aluminium mounting frames and clamps. If your property has more than one storey you will need to hire scaffolding in order to gain roof access.
In order to mount the PV array, it is common for installers to remove roof tiles or slates in order to screw the hooks into roof joists.The hooks for the frames are spread evenly in order to ensure weight distribution. The PV panels are mounted on these frames using clamps. The roof tiles or slates are then replaced, and waterproof flashing is applied to the hooks to avoid roof leakages.
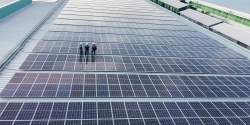
For business or farm use, it is also possible to mount PV panels on other roof types, such as those made from corrugated iron. The mounting process here is similar to that for domestic roofs, although it is sometimes possible to attach arrays directly to the roofing material. Special care should be taken here that the roof will bear the weight of the PV array. Solar panels can of course also be installed on flat roofs using dedicated mounting frames.
The advantage of flat roof installations is that in order to optimise system output, PV arrays can be pitched at any angle and made to face due south, regardless of the roof's orientation. Flat roof installations, do, however, require more hardware, and are therefore more costly. Given, moreover, that they protrude over 20cm from the surface of the roof, such installations will require full planning permission.
Solar PV panels are heavy: they weigh between 15kg and 30kg each, depending on size and manufacturer, with a 4kWh system likely to require 10-14 panels. While most roofs will be strong enough, your roof may need strengthening in order to bear the weight. Roof strengthening can involve a significant additional expense, so it is advisable to check this before installation (your PV surveyor/installer should help you with this).
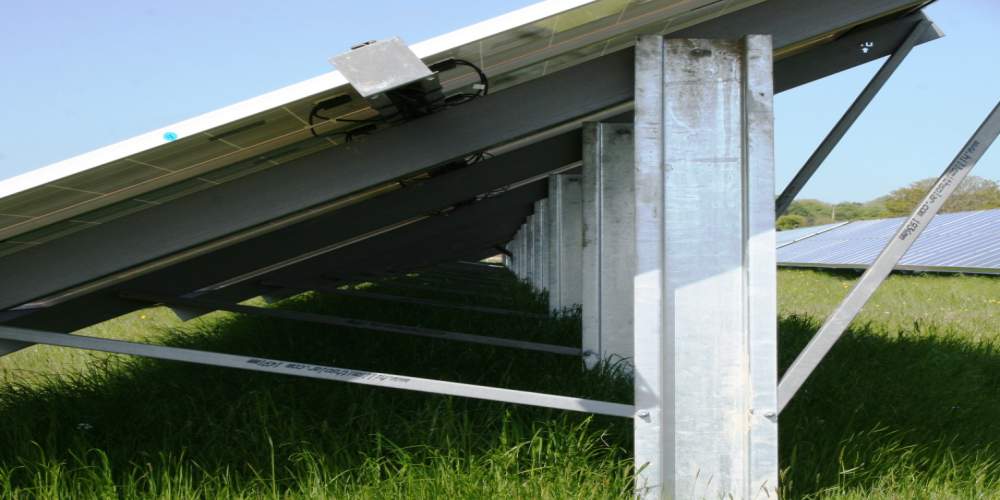
Ground mount frame for Solar Panels

Roof hook & frame for solar panels

Fixed tile hook for solar panels

Flat Roof and Ground Mount
In conclusion:
Solar panels can offer a significant saving on your energy bills whilst contributing towards a more sustainable energy infrastructure. That said, when having solar panels installed, careful planning is always required to get the best system for your money.
A thorough assessment of your roof and energy requirements should be carried out, make sure you choose the right products and installation company for your needs.
Properly orienting and positioning your panels, whether roof or ground mounted is essential. Consider add-ons like batteries or diverters to make the most of your system as well as any maintenance requirements. Do you have a lot of birds in the area? If so, then pidgeon netting could be a good addition.
Installing solar panels is not only an environmentally conscious decision but also a wise financial one. As time passes energy costs increase and solar panels become more efficient, solar power becomes increasingly accessible to homeowners and businesses. When the cost of electricity doubled in 2022, the pay-back period for solar halved. There's never been a better time to invest.
Find a local installer
Welcome to the biggest directory of UK renewable energy companies


 How Much do Solar Panel Systems Cost in 2024?